Deprecated Container Administration
In your JENTIS Account settings you can create and edit existing containers.
For details on the account and container basics please make sure to check: JENTIS Accounts and Containers
In this manual we will quickly run you through the basic steps to create and update container settings.
Create a Container
Navigate to your JENTIS account's "Settings" and click on the "Add New Container" button. Use the assisted mode to guide you through the basic steps, or the "Default Mode" for advanced users to quickly set up all the necessary configurations.

In the assisted mode you will run through the steps. You can skip steps or pause the process and pick it up later.
Domain: This is essential to create for each of your top level domains a new container, so JENTIS operates in first party context (which is mandatory).
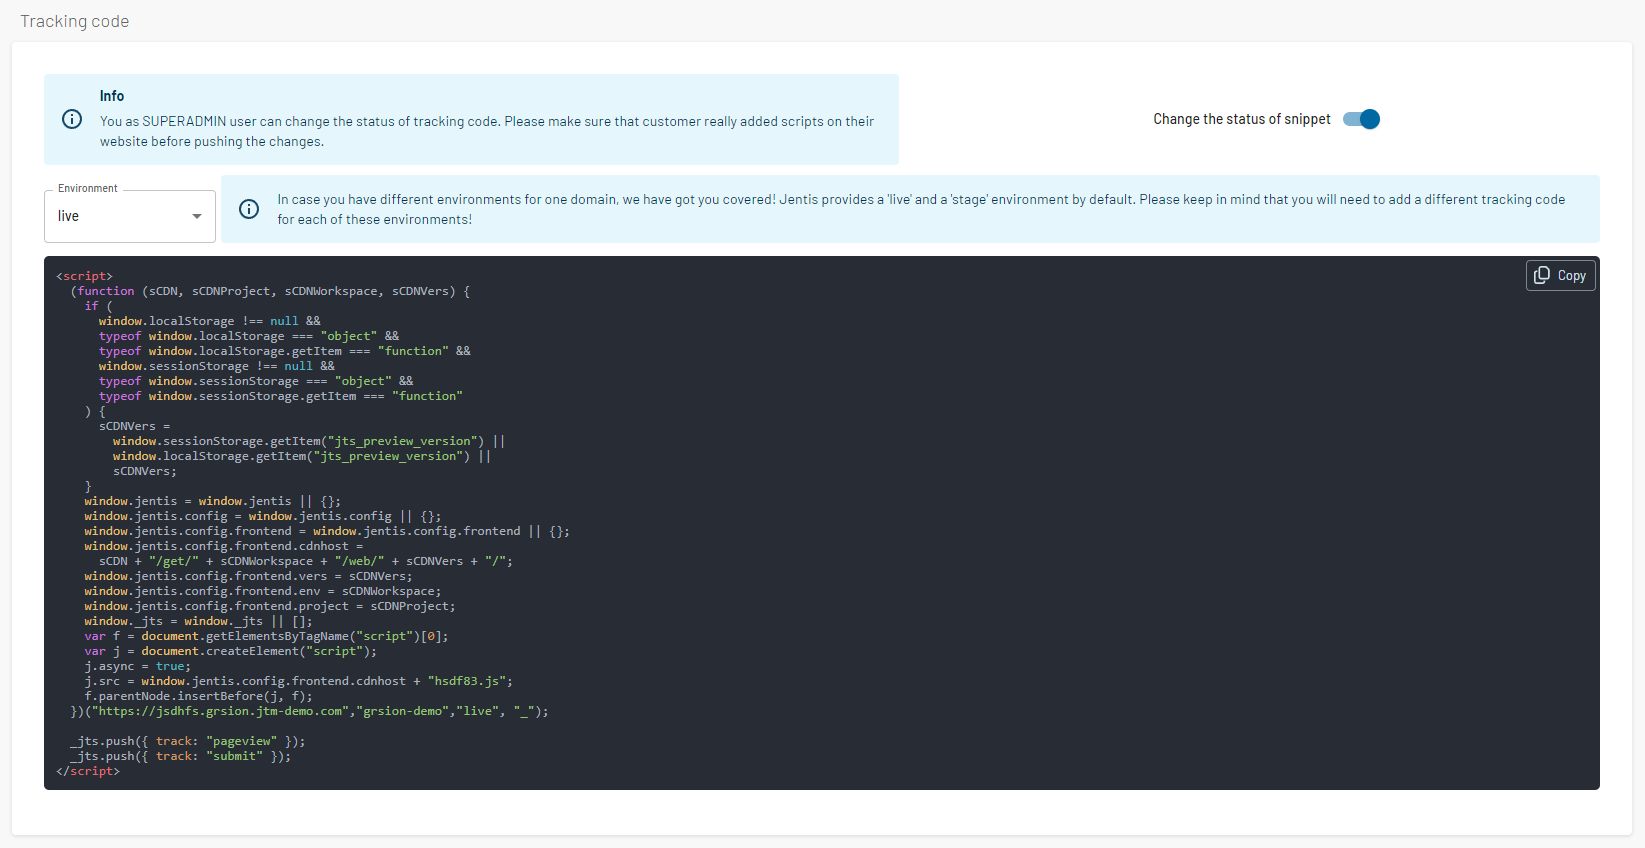
Tracking Setup: This refers to the JENTIS JS Code Snippet to load the JENTIS Web SDK. Please check JENTIS Code Snippet for more details.
DNS Setup: In this step you must make sure that the DNS A record was set on your hosting. Please check DNS Setup for more details.
Consentbar: This optional step will connect to your Consent Management Platform of this website. Please check JENTIS CMP Connectors for more details.
Confirmation: Make sure everything is correct and apply your configuration.
Maximum Storage Lifetime
This feature allows users to configure the maximum lifetime for cookies and local storage entries set by JENTIS. Once a data entry's configured lifetime has expired, it will either be automatically removed by the browser (cookies) or removed by our script the next time a user accesses it (local storage).
The Maximum lifetime can be configured on three levels:
Default set by JENTIS (730 days / 2 years)
Global Default Customer setting, which is applicable for all containers of the JENTIS account
Container level setting
We will always use the most specific setting when calculating the maximum lifetime. The lifetime limit is applied as soon as you publish your configuration.

Important to note that this functionality only works with the JENTIS wrapper scripts that are provided with the JENTIS Web SDK.
CODE
|
Best Practice on Container Environments
Many JENTIS users face a situation where one container alone is not sufficient to enable a full dev/stage/production process.
Generally a container has an environment setting that is either "live" or "stage". But there are situations where this setting alone can not be used. Also for migration and release processes we must discuss some concepts of best practice.
Regular Use of Environments
In the most easy scenario you have one website and domain. The stage environment of your frontend website lives on this same domain, ie. "http://stage.mywebsite.com " while the production environment is found on "http://www.mywebsite.com ".
In this case we recommend one single JENTIS container for this website. In this container you can use two slightly different JS code snippets to embed the right environment: JENTIS Code Snippet

Above the code snippet in the left corner you can select the environment: live or stage. It will generate two different code snippets to use on each.
This is the best practice for one domain. You must not migrate (copy paste) any setting from one place to the other, just release to the right environment in the Versions and Preview.
Advanced Use of Environments
In some cases a single container can not work for a website, as it maybe is living on different top level domains ie. "http://www.mywebsite.com " and "stage-mywebsite.com". In that and other cases it is or may be mandatory to create a container for each environment.
Multiple containers than have a reference to the environment in the name, "mywebsite PROD" and "mywebsite STAGE" where both containers have it's own DNS A record and JENTIS Code Snippet.
With this setup you can work similarly as with the regular environment, only the publishing and migration is slightly different.
Migration on Multi Container Environment
Now with multiple containers JENTIS scales as good as with the regular use of environments. There is just one setting for the elements that are local to containers. As you might remember from our introduction article to containers the following elements are per-container basis: tools, tags, custom code and CMP connections.
To move a setting you simply must select the container you want to use on a certain environment:

With this configuration you can control what is executed on which container (that represents a certain environment). This must be set for each local element:
Tools (and hence all tags associated with this tool)
When a setting is ready for an environment it is again the regular process of releasing that container version. When publishing you must simply select both environments (as this container-environment setting is not put into use in this scenario).
