JENTIS Code Snippet
JENTIS Tracking Code Snippet
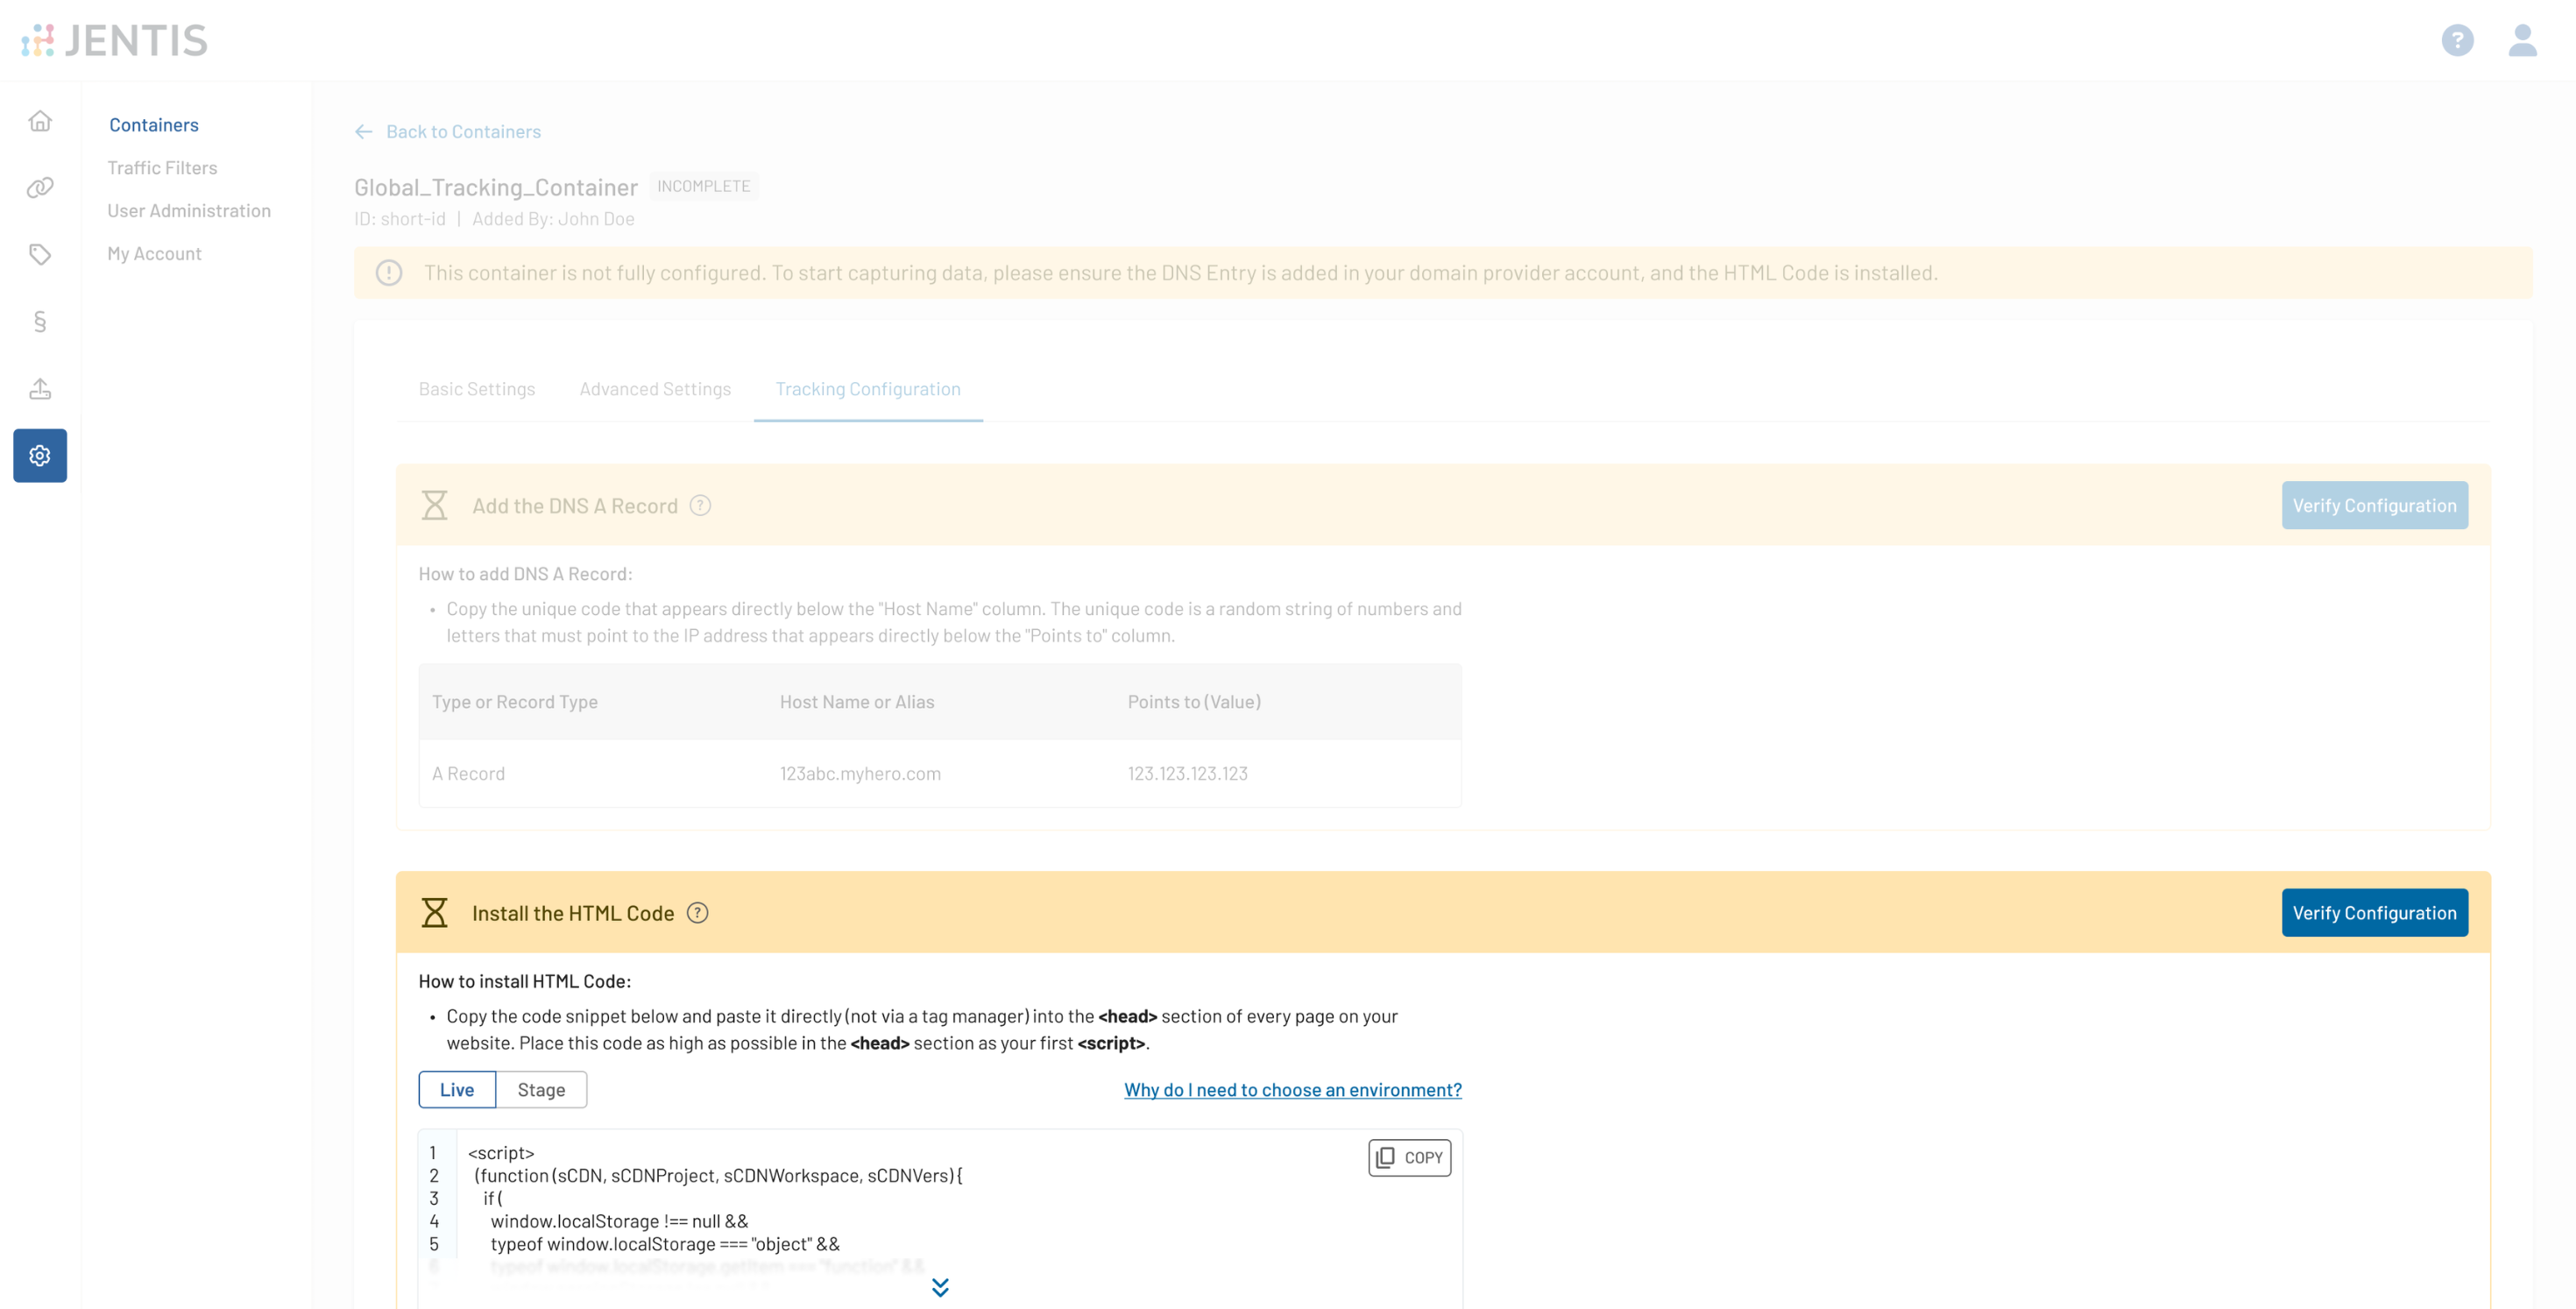
In order to begin collecting data with JENTIS on your website, it is necessary to integrate a JavaScript code snippet.
We suggest inserting this code snippet as high as possible within the HTML head section of your website. This will create the optimal conditions for a stable and reliable stream of data.
It is essential to insert the tracking code snippet directly on your website and not via third-party tools.
Do not Copy/Paste the following snippet or parts of it. The following code is just a visual example.
You will find your individual code in your JENTIS account (homepage).
JavaScript
// DO NOT COPY - JUST FOR VISUAL REFERENCE

(function (sCDN, sCDNProject, sCDNWorkspace, sCDNVers) {
  if (
    window.localStorage !== null &&
    typeof window.localStorage === "object" &&
    typeof window.localStorage.getItem === "function" &&
    window.sessionStorage !== null &&
    typeof window.sessionStorage === "object" &&
    typeof window.sessionStorage.getItem === "function"
  ) {
    sCDNVers =
      window.sessionStorage.getItem("jts_preview_version") ||
      window.localStorage.getItem("jts_preview_version") ||
      sCDNVers;
  }
  window.jentis = window.jentis || {};
  window.jentis.config = window.jentis.config || {};
  window.jentis.config.frontend = window.jentis.config.frontend || {};
  window.jentis.config.frontend.cdnhost =
    sCDN + "/get/" + sCDNWorkspace + "/web/" + sCDNVers + "/";
  window.jentis.config.frontend.vers = sCDNVers;
  window.jentis.config.frontend.env = sCDNWorkspace;
  window.jentis.config.frontend.project = sCDNProject;
  window._jts = window._jts || [];
  var f = document.getElementsByTagName("script")[0];
  var j = document.createElement("script");
  j.async = true;
  j.src = window.jentis.config.frontend.cdnhost + "<filehash>.js";
  f.parentNode.insertBefore(j, f);
})("<trackdomain>","<trackid>","<environment>", "<version>");
You will find your exact JavaScript snippet by creating a new container or editing an existing one:
Placeholder
Placeholder | Description | Type | Example |
|---|---|---|---|
<trackdomain> | Your JENTIS container DNS Domain. This will be replaced in your individual JTM container automatically when the code is generated in the UI. | string | |
<trackid> | Your JENTIS container Identifier. This will be replaced in your individual JTM container automatically when the code is generated in the UI. | string | example-id |
<environment> | Replace the placeholder with a string defined for your environment. The following setup should be used as a default: | string | live |
<version> | By default the code will fallback to the latest version, indicated by a Optionally replace the placeholder with a string which defines the version you want to load to your setup, if no dynamic update is desired. The following setup will be used as a default: | string | _ |
<filehash> | A unique identifier for a container source file. This will be replaced in your individual JTM container automatically when the code is generated in the UI. | string | hj8kds |
Testing
If you have correctly set up the JENTIS tracking code snippet, you will be able to find a network log entry (HTTP stream) in your browser's developer tools.
The resource loaded looks like the following:
https://<hash>.example.at/get/live/web/_/<filehash>.jsThe DNS A record has to be set to ensure the JENTIS script is loaded correctly. Read the article DNS Setup .
After these steps, the script will load and respond with a 200 status code. Now, a secure connection can be established, and your Javascript is available.
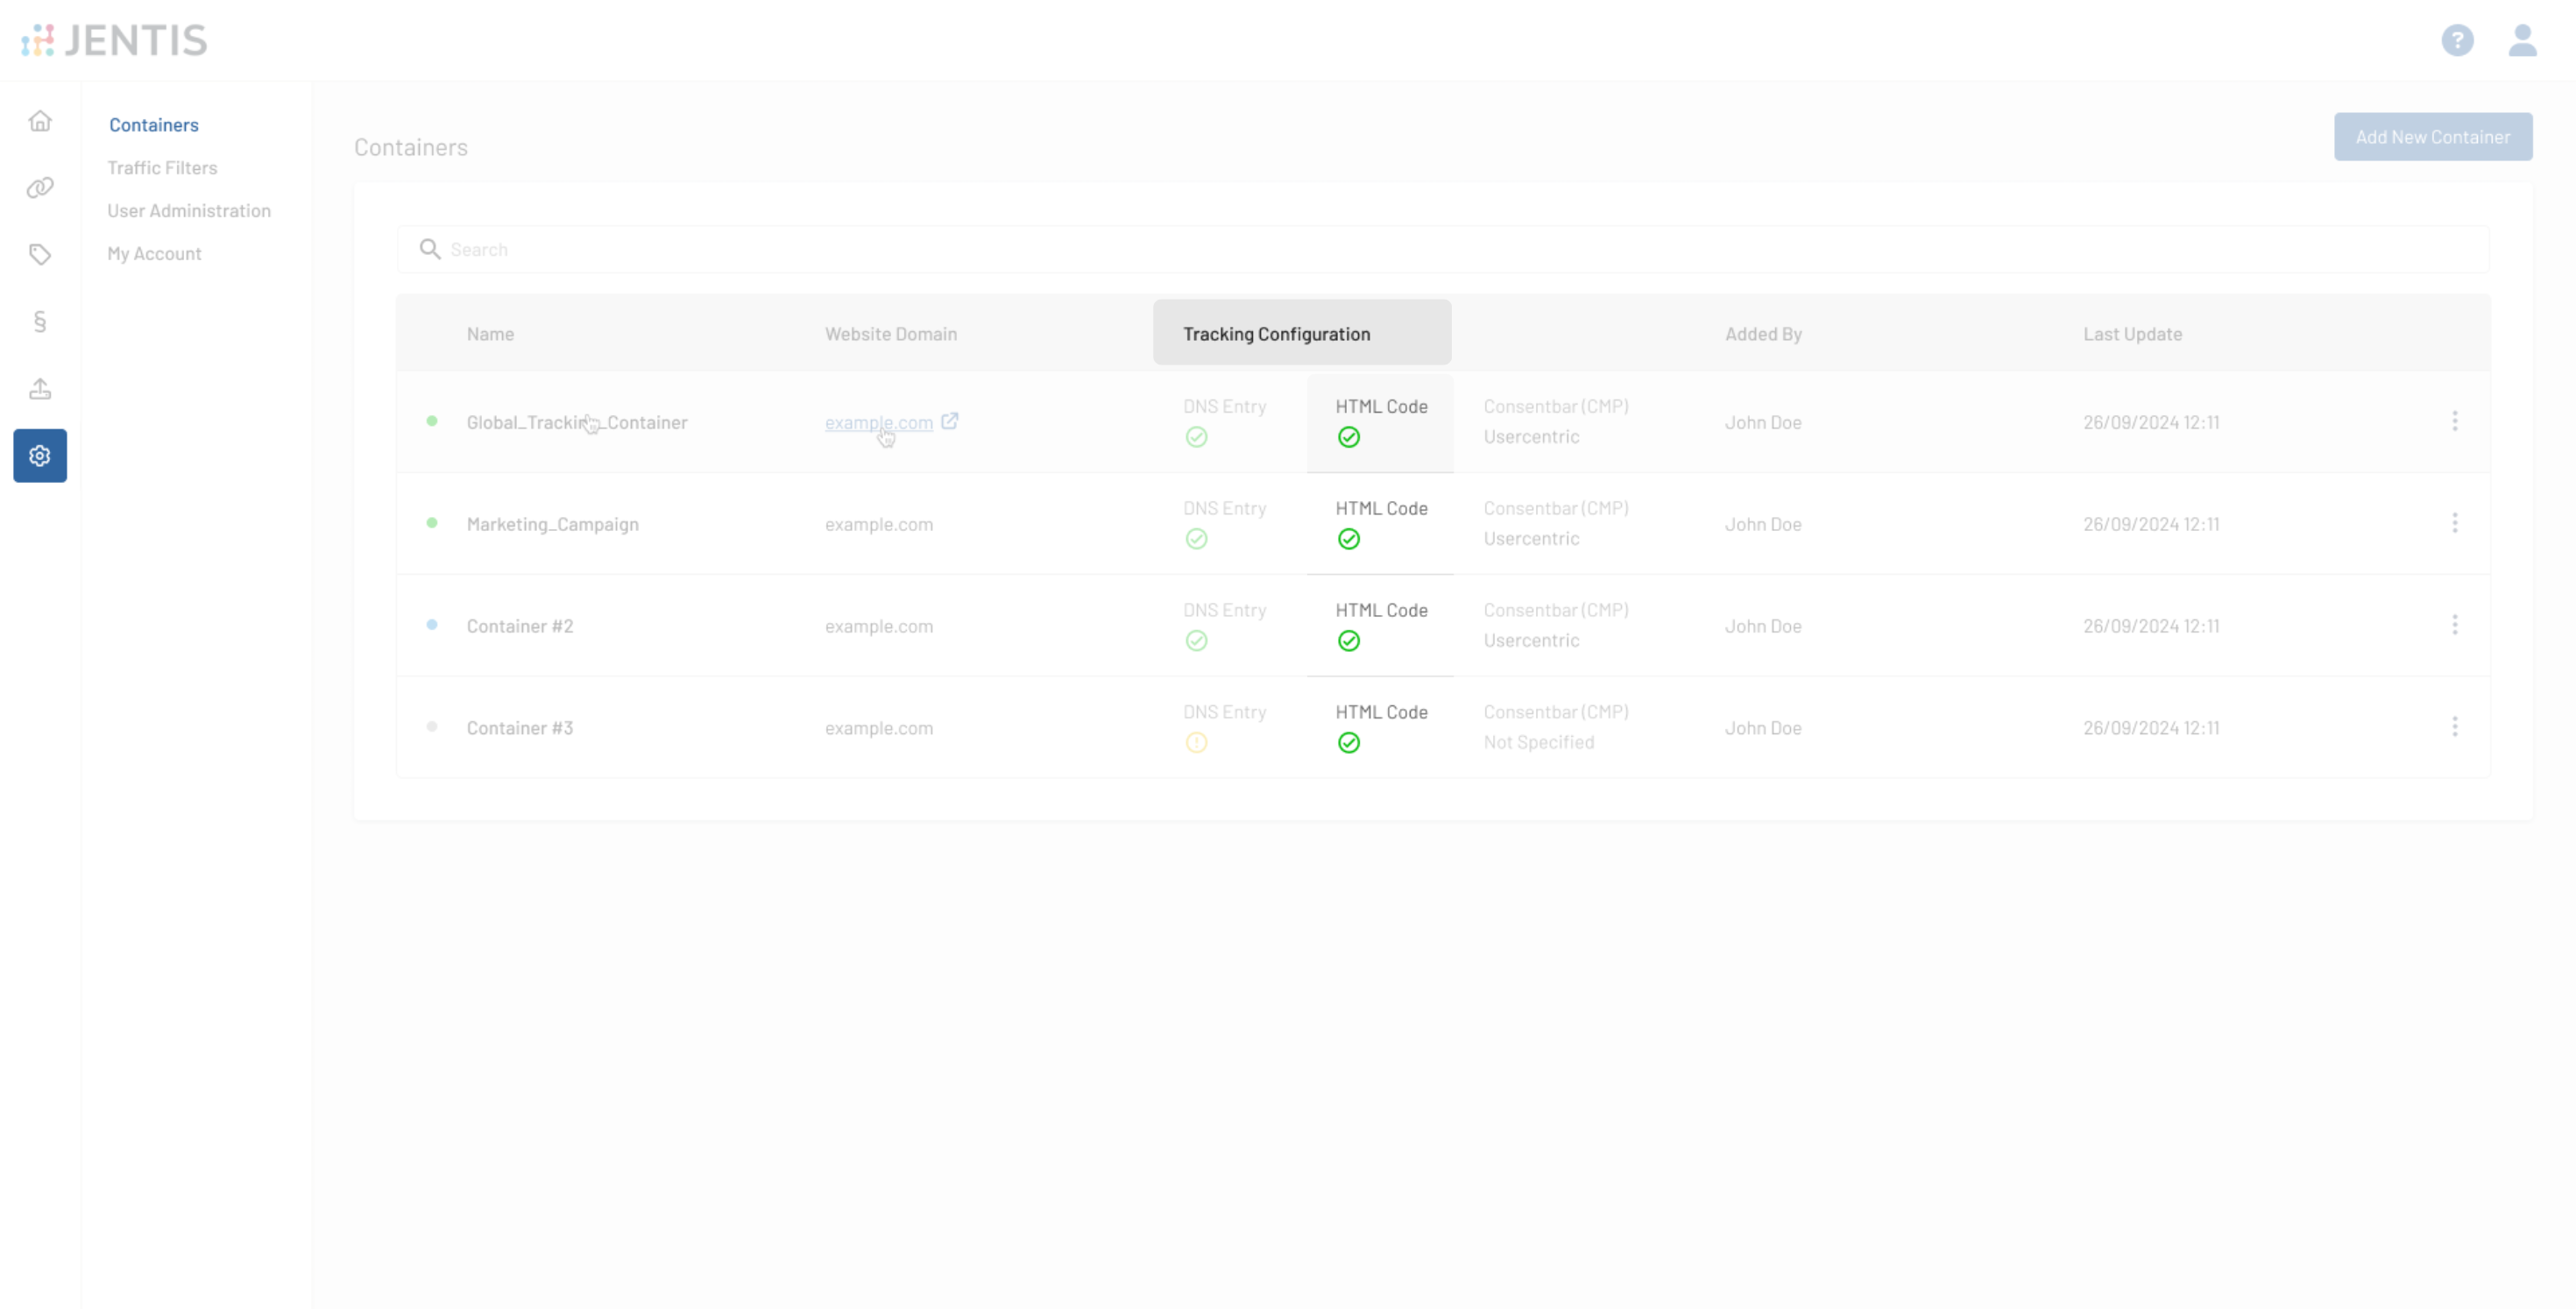
Your configuration will also be automatically verified in up to 30 minutes after you set up the JENTIS tracking code snippet on your website. Alternatively, you can return to your container’s configuration and click on Verify.
You can always check the status of your HTML Code on your containers' configuration:
Start Tracking
To implement the very first call and therefore tell JENTIS what to do you might use the following call. This will instruct JENTIS to track a pageview, which is the most common first step to start tracking.
JavaScript
_jts.push({track:"pageview"});
_jts.push({track:"submit"});
This call can be implemented in your web application and thus activate tracking whenever a page is navigated.
A different idea might be to use this two lines of code and add it in your JENTIS account as a custom element in the Codes section. So JENTIS will automatically track a pageview every time the JENTIS basic tracking code snippet is loaded up.
Next Steps
Now that we have JENTIS up and running on your website - how about the tracking map? Do you have already a clear plan on further implementation to meet certain goals?
Let's look into the Architecture Guideline: Push or Pull Data for the options we have to meet all those objectives on tracking.
If you have any questions or suggestions, contact us through our Helpdesk.