Multi-Tag Edit
Problem
When managing tags in your system, you may encounter situations where several tags share identical fields. Previously, updating the value of a field for multiple tags required manual editing of each tag individually, which was particularly cumbersome for list items intended for uniform tracking across tags. This process was not only time-consuming but also prone to inconsistencies.
Our Solution
With the Multi-Tag Edit on the JENTIS Tag Manager, users can update multiple tags simultaneously, significantly saving time and ensuring uniform field values across different tags.
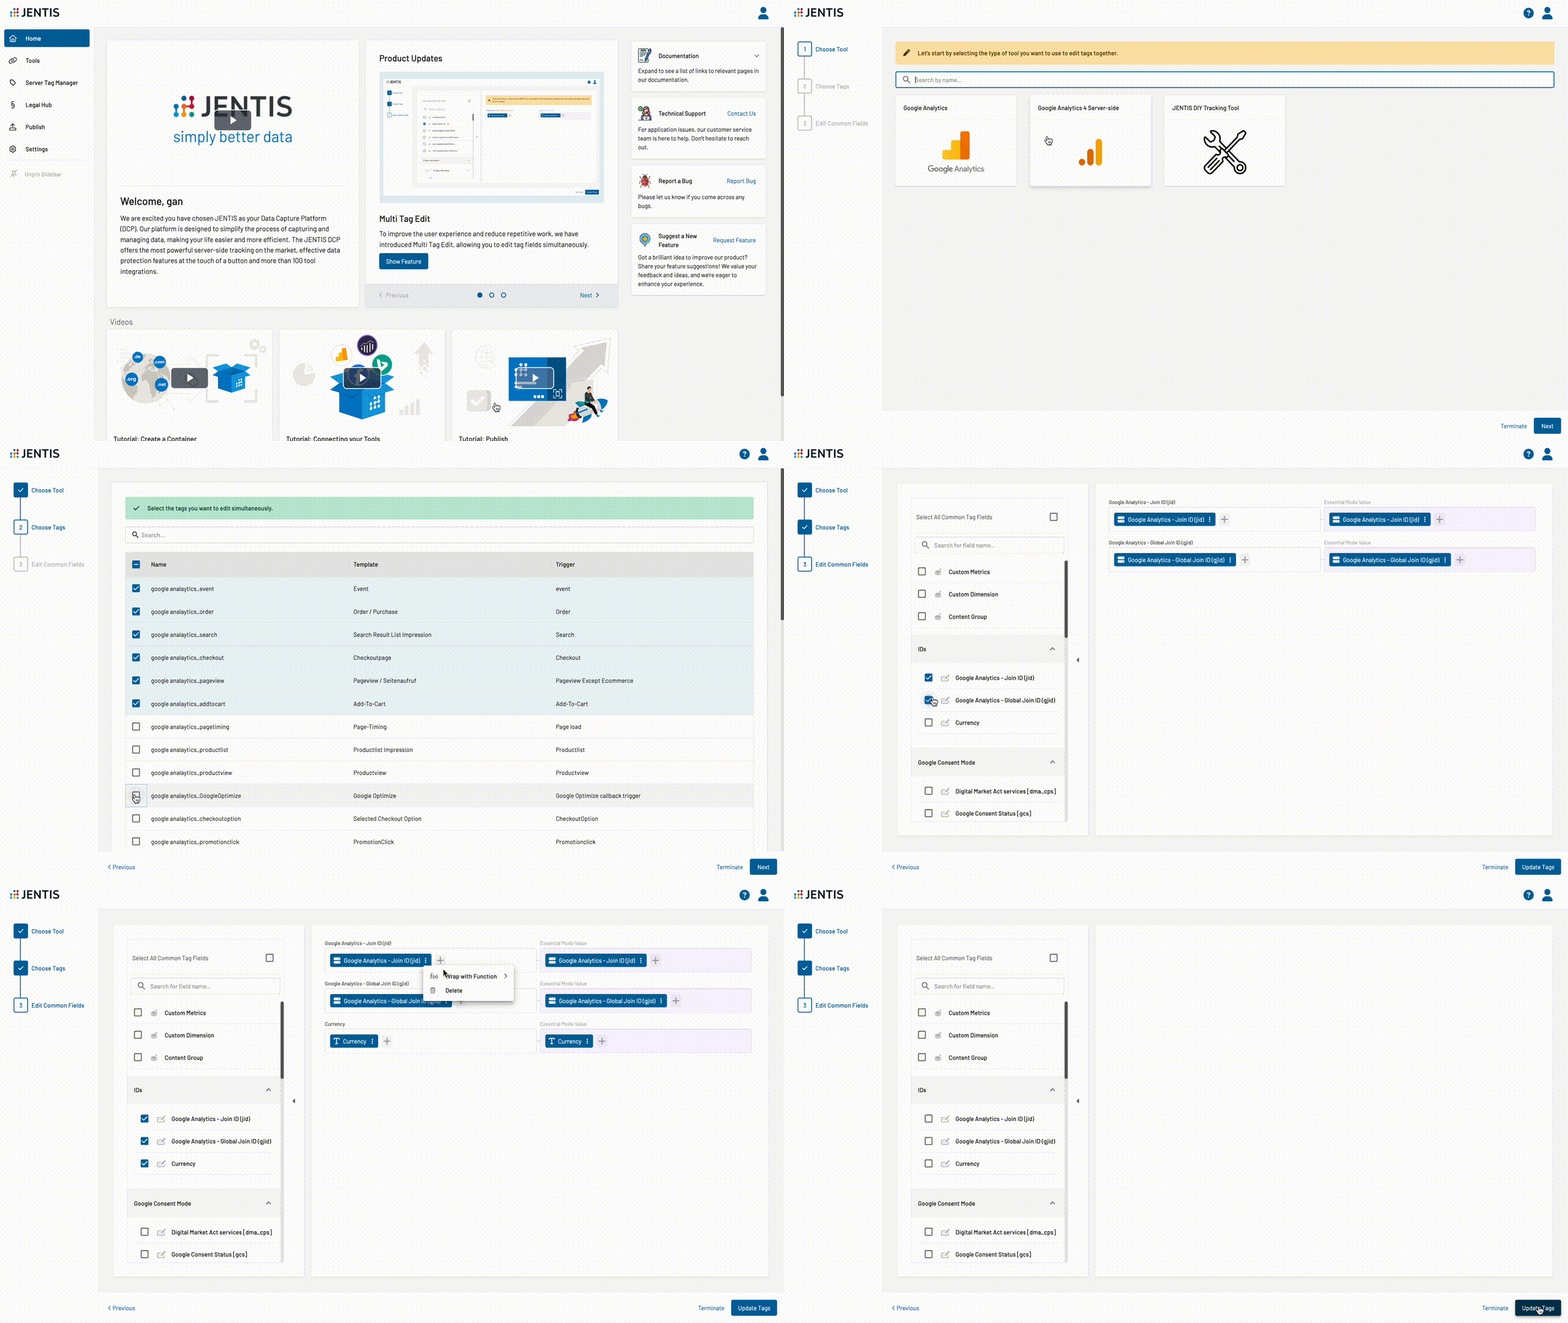
How to use it
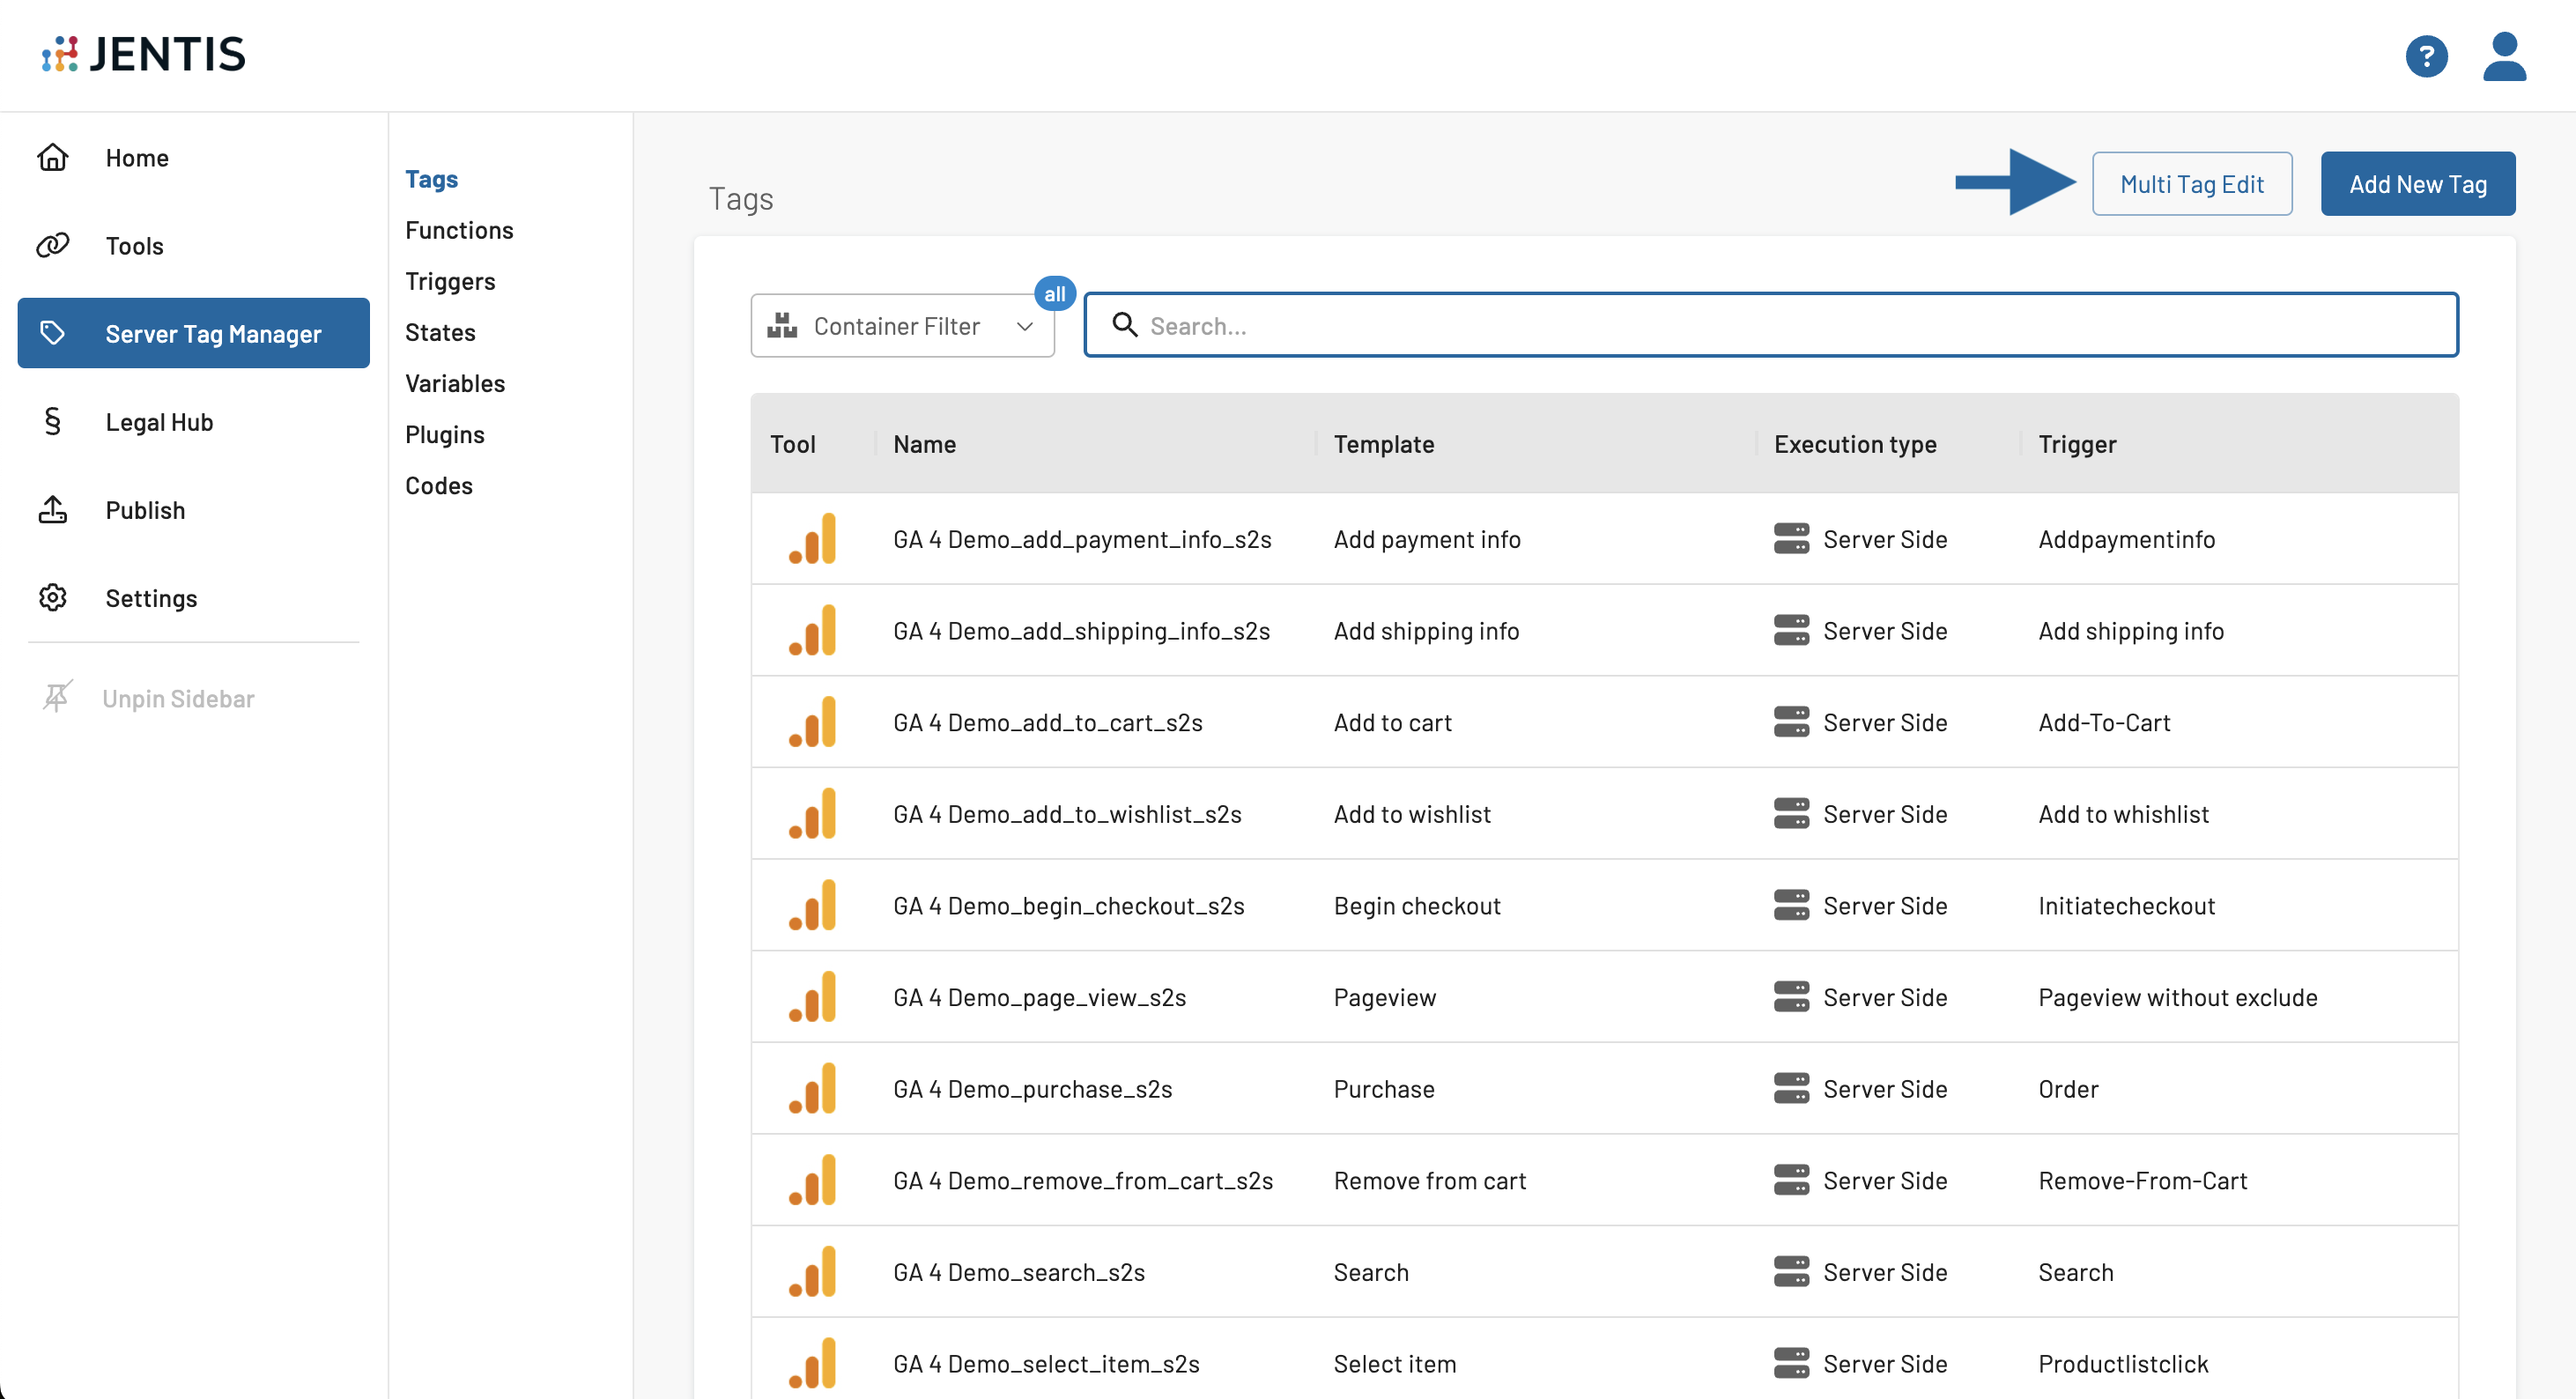
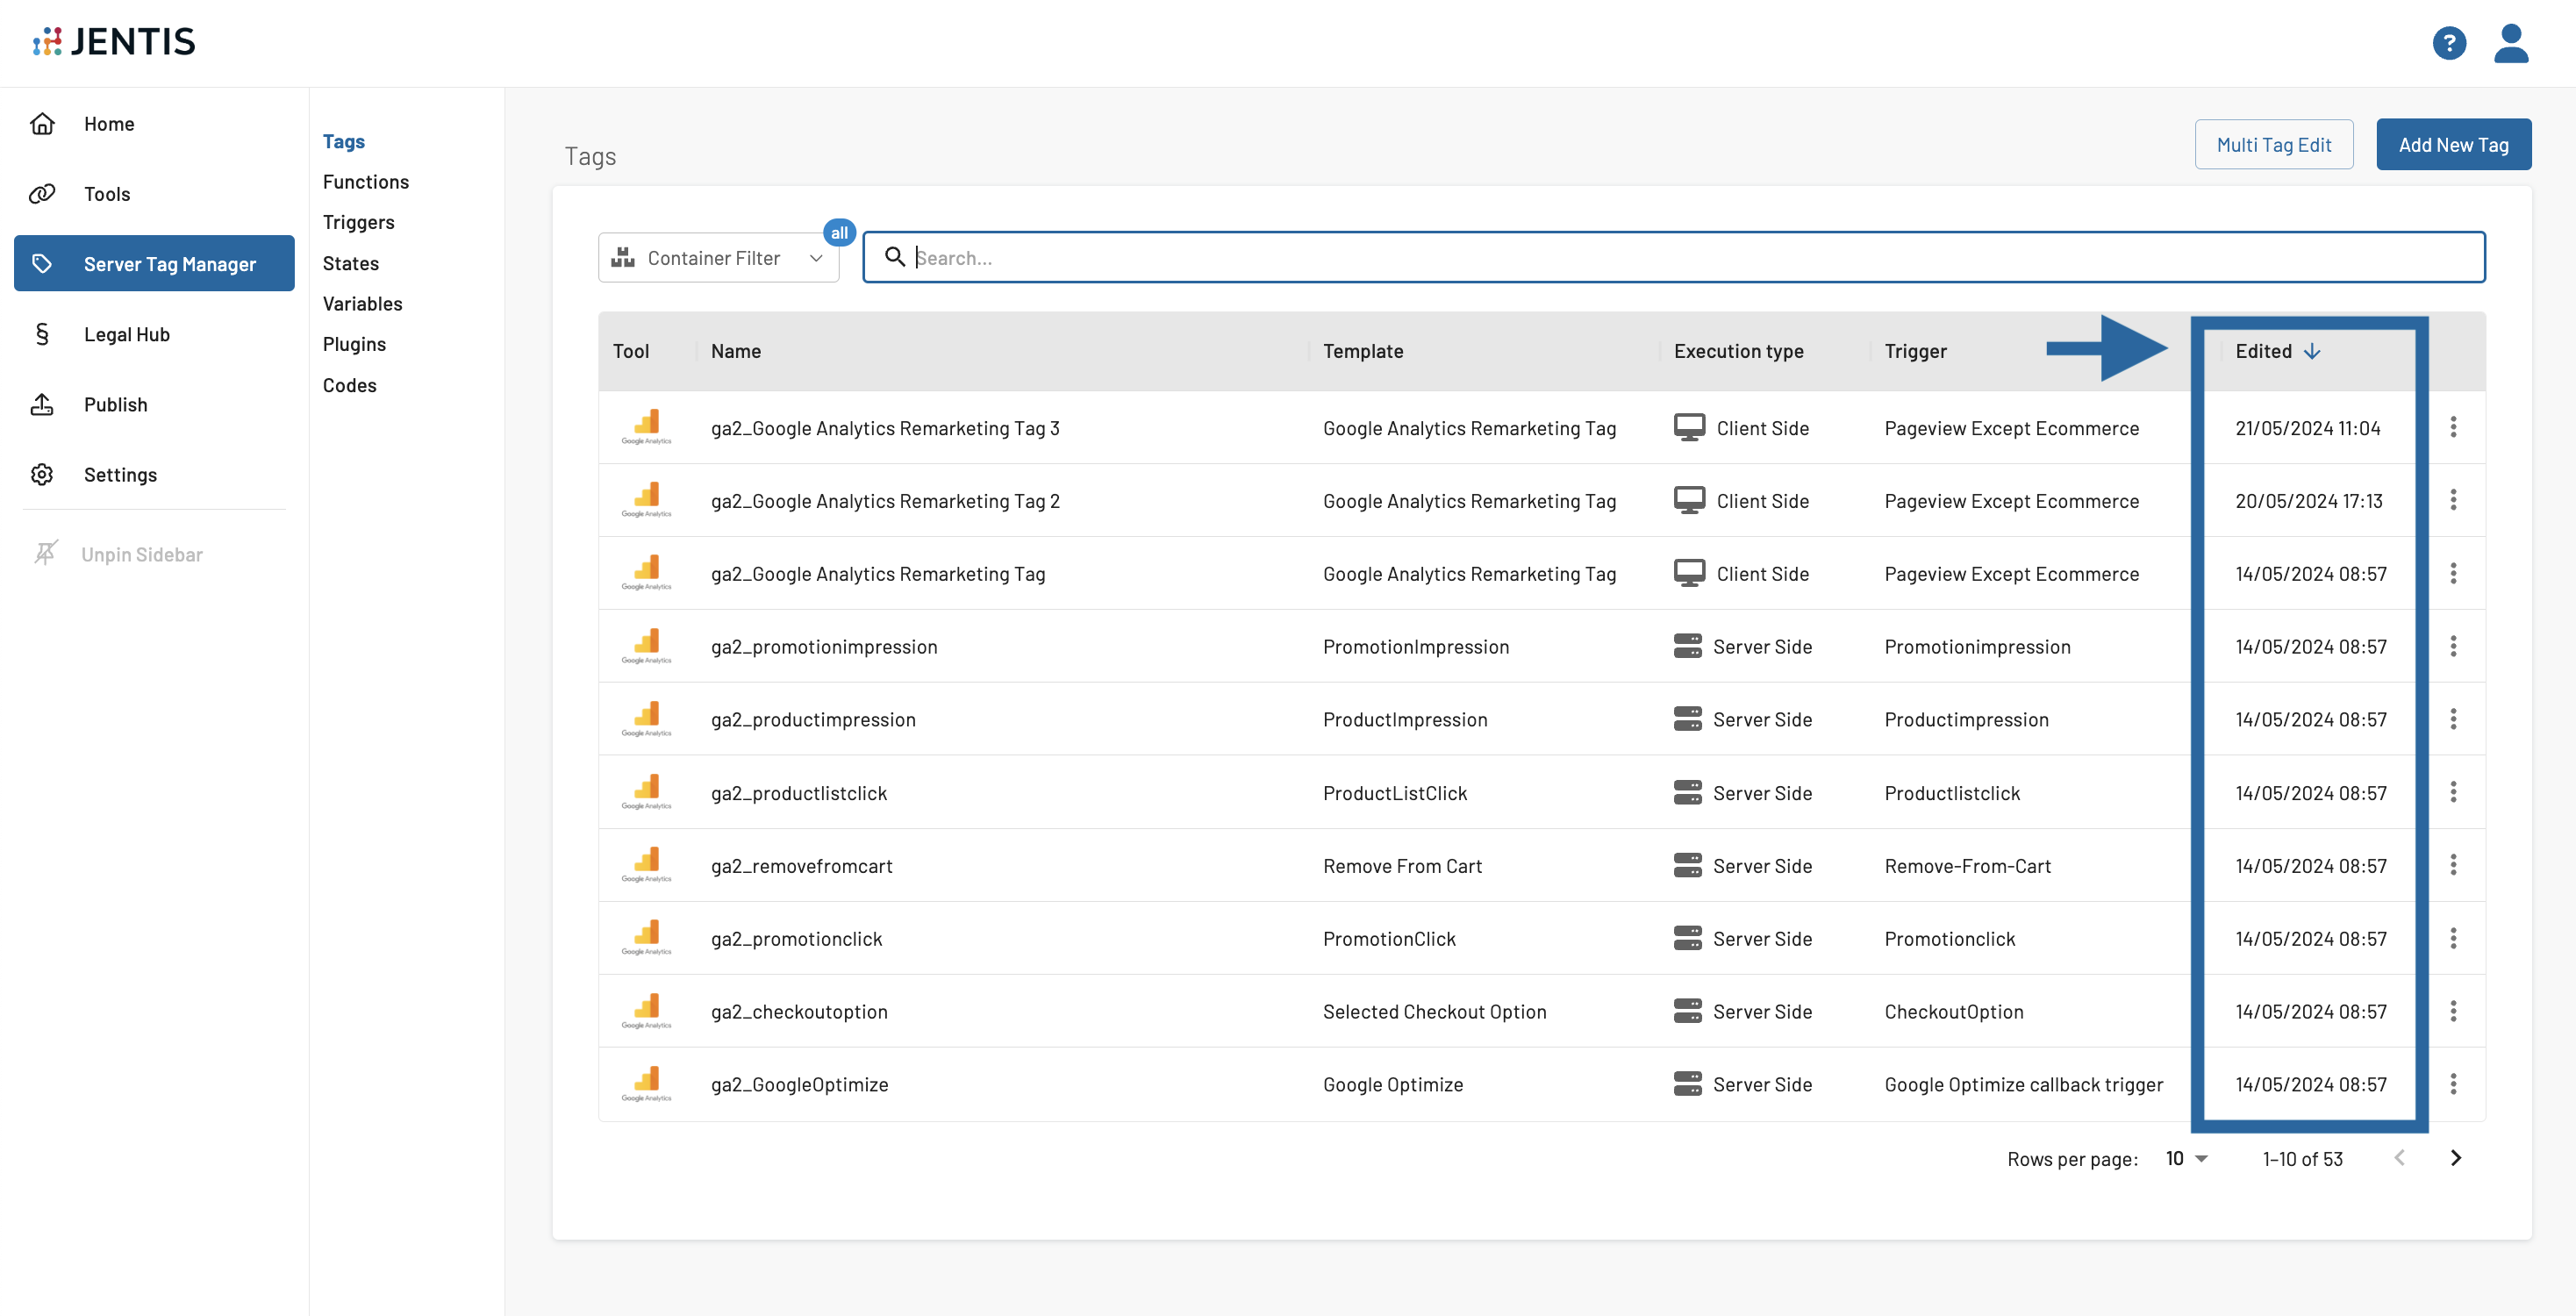
Access the tags section on the Tag Management and click on the "Multi Tag Edit" button;
Select the type of tool which tags you would like to edit. E.g.: Google Analytics, Google Analytics 4 Server-Side.

Select the tags you want to edit simultaneously. On the "Name” column, you can check to which tool configuration each tag is associated.

You'll find on the left sidebar a selection of fields that are common across all tags. By selecting any of these fields, they will be automatically updated across all the tags you previously selected. You can also click to select all common fields if you want to edit everything.
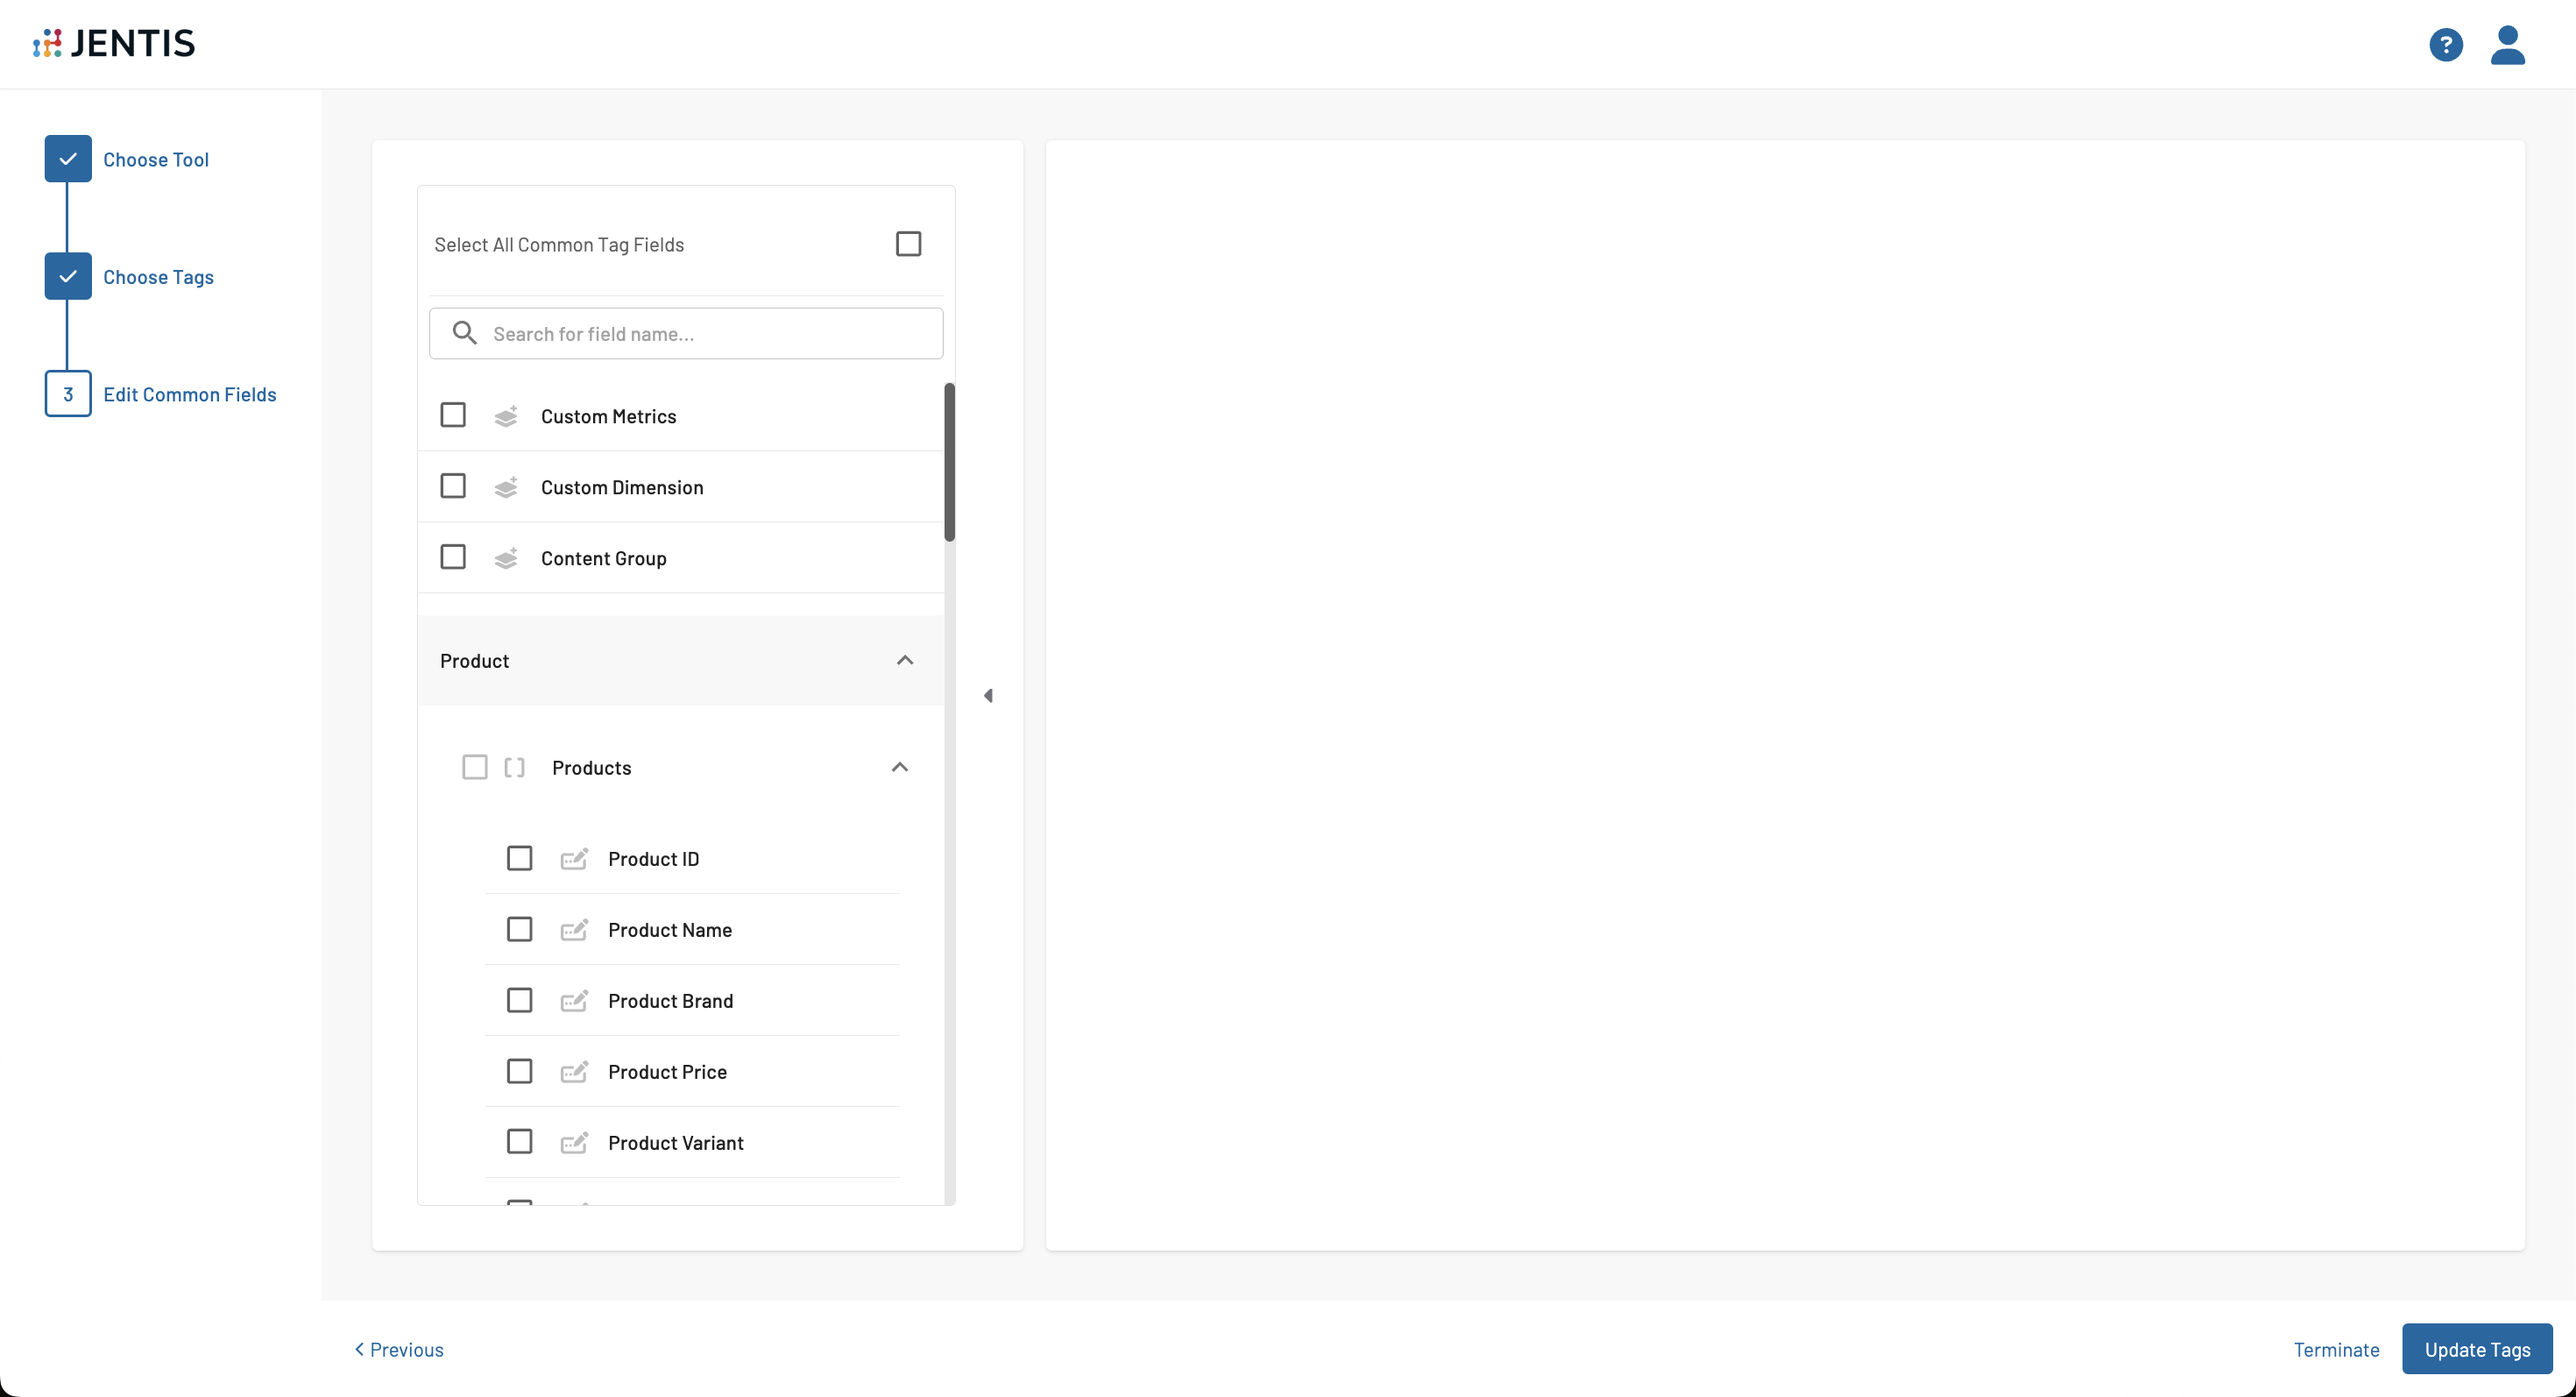
The fields within the tags are categorized into three types for ease of management:
simple fields

grouped fields

list fields

Google Analytics - Join ID (jid) here is a simple field

Products here is a grouped field with the selected simple field Product ID

Custom Metrics here is a list field

Check here how to edit each type of field.
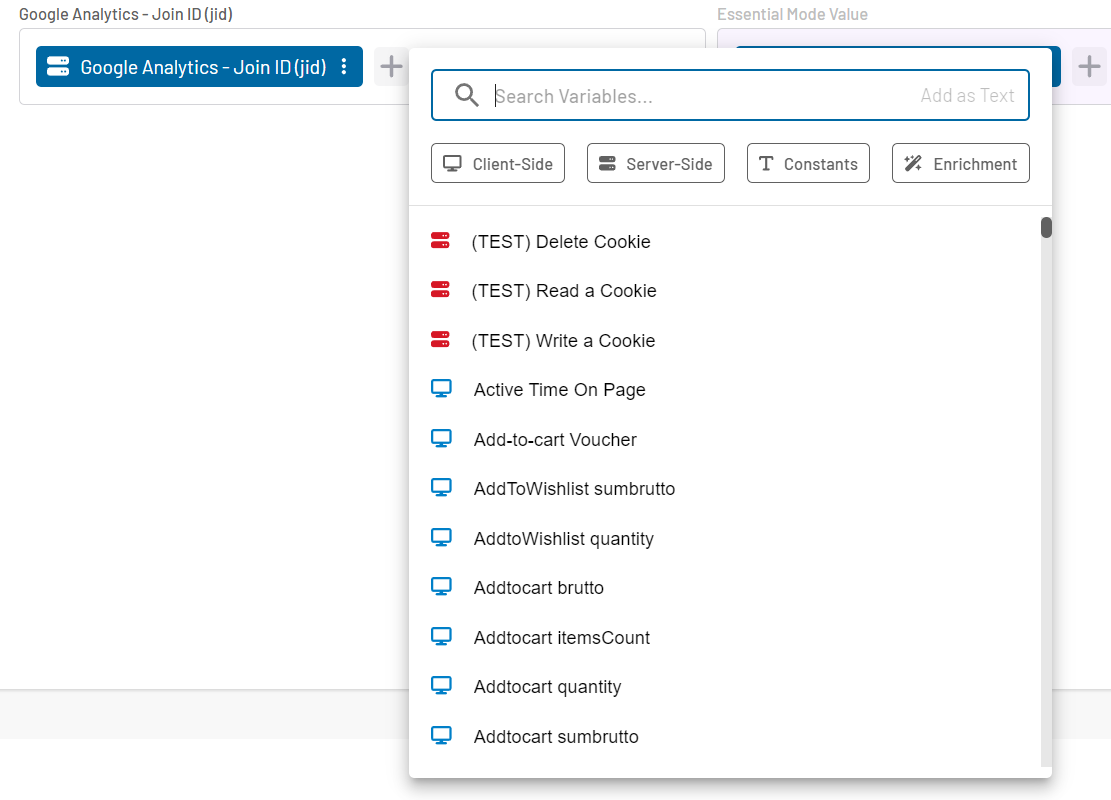
You have several options for customizing the data you input into these fields:
Variables: Choose from four types of variables to insert into your fields.
Text Inclusion: Opt to include plain text if variable functionality is not required.
Function Wrapping: For more complex data manipulation, you can wrap variables with a function to perform specific operations or calculations.
This flexible approach allows you to tailor the data entry process to meet the specific requirements of your tagging system efficiently.

When your adjustments are complete and you are satisfied with the setup, click on the "Update Tags" button. This action ensures that only the fields you have selected are updated across the corresponding tags, maintaining accuracy and consistency in your tag management.
Once you save the changes, you can go back to all your tags, order by edited date and check the latest ones that were changed. You can also click on the three dots, then “change log” and see exactly which values were changed in that tag.
If you have any questions or suggestions, contact us through our Helpdesk.
