App Tracking: Using your app data in the JENTIS Platform
This article explains how you can access tracked data from the JENTIS App SDK in our platform. You will need app development expertise and access to your JENTIS Platform.
The main difference between tracking on your website and on your app is that the App SDK has no direct connection to JENTIS and only sends information to our servers. Therefore, accessing and using this information in variables requires a different approach.
There are two possible approaches to this: creating a client-side variable or a server-side one. Please choose the one that best fits your needs:
Approach 1: Client-Side Variable
On web tracking, Client-Side Variables extract information from the browser using JavaScript functions.
Remember: The App SDK has no direct connection to the JENTIS Platform. Therefore, we can’t use Client-Side variables like we use on the website, but we can use them as placeholders for our App SDK.
On the JENTIS Platform, you can create a new variable by accessing Server Tag Manager > Add New Variable > Client Side Javascript Code. We recommend naming these variables with a prefix such as app_sdk_<name_of_variable>.
Once you type the variable name, the ID will be generated automatically. Please use this generated ID for the push() commands of the JENTIS App SDK. The JENTIS Platform will automatically assign the pushed value to the corresponding variable by pushing a dataset with this ID as the key.
Example
The following data is pushed to the JENTIS App SDK data layer:
TrackingService.shared.push([
    "track": "pageview",
    "pagetitle": "Demo-APP Pagetitle",
    "url": "https://www.demoapp.com",
    "app_sdk_device_screen" : "Screen for testing the tracking"
])

TrackingService.shared.submit()
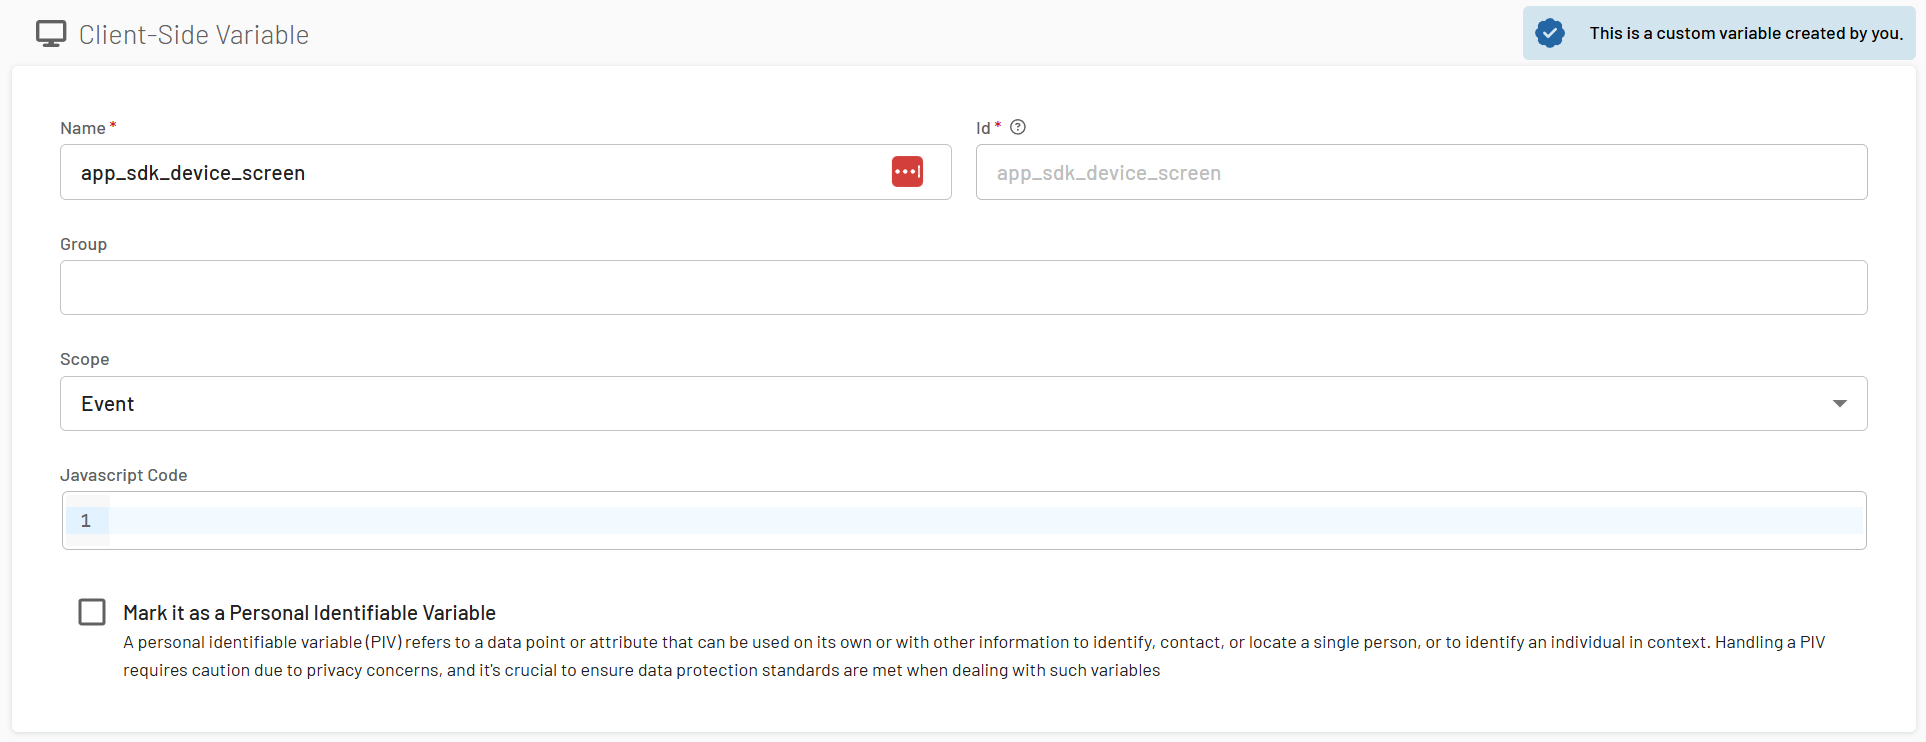
Next, to access the value of the property app_sdk_devices_screen, create a client-side variable:

The scope should be fixed to “Event”
The JavaScript code can be left empty, as it is not required for the JENTIS App SDK.
Using this client-side variable in server-side tags will automatically retrieve the value from the data pushed by the JENTIS App SDK and resolved to “Screen for testing the tracking”.
Approach 2: Server-Side Variable
If you prefer not to use the previous approach, which involves creating client-side variables as placeholders to extract information from the JENTIS App SDK data layer, we offer an alternative option of creating a server-side variable.
To access the JENTIS App SDK data layer with server-side variables, we provide a template variable that allows direct access to a key in the pushed data layer.
The template variable can be found in the JENTIS Platform under Server Tag Manager > Add New Variable > Server Side, and by selecting the template “APP SDK Datalayer Property”.
Example
The following data is pushed to the JENTIS App SDK data layer:
TrackingService.shared.push([
    "track": "pageview",
    "pagetitle": "Demo-APP Pagetitle",
    "url": "https://www.demoapp.com",
    "app_sdk_device_screen" : "Screen for testing the tracking"
])

TrackingService.shared.submit()
Next, to access the value of the property app_sdk_devices_screen, create a server-side variable using the template “APP SDK Datalayer Property”:

By using this server-side variable in server-side tags, the value will automatically be retrieved from the data pushed by the JENTIS APP SDK and resolved to “Screen for testing the tracking”.
JENTIS SDK default properties
jtspushedcommands
On every HTTP-Request sent to the JENTIS Platform from the JENTIS App SDK, the property jtspushedcommands is added per default as an array. When data is pushed to the data layer, fitting to the JENTIS structure, the JENTIS App SDK is correctly building up the property, by adding all track commands to the jtspushedcommands property.
Example
The following data is pushed to the JENTIS APP SDK data layer:
TrackingService.shared.push([
    "track": "pageview",
    "pagetitle": "Demo-APP Order Confirmed"
])

TrackingService.shared.push([
    "track": "product",
    "type": "order",
    "id": "123",
    "name": "Testproduct",
    "brutto": 199.99
])

TrackingService.shared.push([
    "track": "product",
    "type": "order",
    "id": "456",
    "name": "Testproduct 2",
    "brutto": 299.99
])

TrackingService.shared.push([
    "track": "order",
    "orderid": "12345666",
    "brutto": 499.98,
    "paytype": "creditcard"
])

TrackingService.shared.submit()
The property jtspushedcommands will have the following value:
jtspushedcommands : ["pageview","product","product","order","submit"]Product data
When tracking product data with the JENTIS App SDK, the SDK reformats the tracked data into a format that the JENTIS Platform can understand. This format is identical to the one used in the web tracking environment.
Whenever the track command for “product” is used, all properties of each tracked product are concatenated into an array, with the prefix “product_” added to each property in the HTTP request sent to JENTIS. This structure aligns with our approach of using an array list for tracking product data and supports filtering like in the web tracking environment.
Example
The following data is pushed to the JENTIS APP SDK data layer:
TrackingService.shared.push([
    "track": "pageview",
    "pagetitle": "Demo-APP Order Confirmed"
])

TrackingService.shared.push([
    "track": "product",
    "type": "order",
    "id": "123",
    "name": "Testproduct",
    "brutto": 199.99
])

TrackingService.shared.push([
    "track": "product",
    "type": "currentcart",
    "id": "777",
  	"color": "green"
])

TrackingService.shared.push([
    "track": "product",
    "type": "order",
    "id": "456",
    "name": "Testproduct 2",
    "brutto": 299.99
])

TrackingService.shared.push([
    "track": "order",
    "orderid": "12345666",
    "brutto": 499.98,
    "paytype": "creditcard"
])

TrackingService.shared.submit()
This example will generate the following properties in our HTTP-Request to JENTIS:
{
  "jtspushedcommands" : ["pageview","product","product","product","order","submit"],
  "pagetitle" : "Demo-APP Order Confirmed",
  "product_type" : ["order","currentcart","order"],
  "product_id" : ["123","777","456"],
  "product_name" : ["Testproduct 1","","Testproduct 2"],
  "product_brutto" : [199.99,"",299.99],
  "product_color" : ["","green",""],
  "orderid" : "12345666",
  "brutto" : 499.98,
  "paytype" : "creditcard"
}
Change the State (Initiator)
By default, the state 'JENTIS Datalayer SENT' is used to initiate processing on the JENTIS backends. If you prefer to use a different state for transmitting data to JENTIS and wish to implement a custom solution, you can simply pass the desired State-ID, available in the JENTIS Platform, as an argument to the submit function call.

iOS Implementation:
try await TrackingService.shared.submit(customInitiator)Android Implementation:
JentisTrackService.getInstance().submit(customInitiator)Read next
If you have any questions or suggestions, contact us through our Helpdesk.
