Create a Content Custom Dimension for Google Analytics with JTM
A common use case with tracking is when a variable is selected from a website (such as a page title) and submitted as a custom dimension with Google Analytics. In this guide we will show you how to extract values in the front end and submit those with a tag in the JENTIS Tag Manager (JTM).
Prerequisites
Our goal is to track a custom dimension with a meaningful value. The scope of this dimension in Google Analytics will be HIT (so this value is only valid per this event) and those are the outlines of our definition.
Property | Description | Value |
|---|---|---|
custom dimension scope | Google Analytics internal definition of the persistance of data. | HIT |
custom dimension index | Google Analytics internal definition of an index for reference. | 1 |
custom dimension value | CSS Selector of a html tag attribute property: “blog post author name” | .h4 #author (inner text value of first selected element) |
Now we need to implement all the required parts in the JTM actually to track this value with each pageview.
The steps of this process are:
Implement a JTM Frontend Variable to select the value.
Update the JTM Google Analytics server side pageview tag to submit the custom dimension value.
Preview and publish this new version of the JTM
Creating the JTM Frontend Variable
Navigate to the Server Tag Manager: Frontend Variables section and create a new entry.
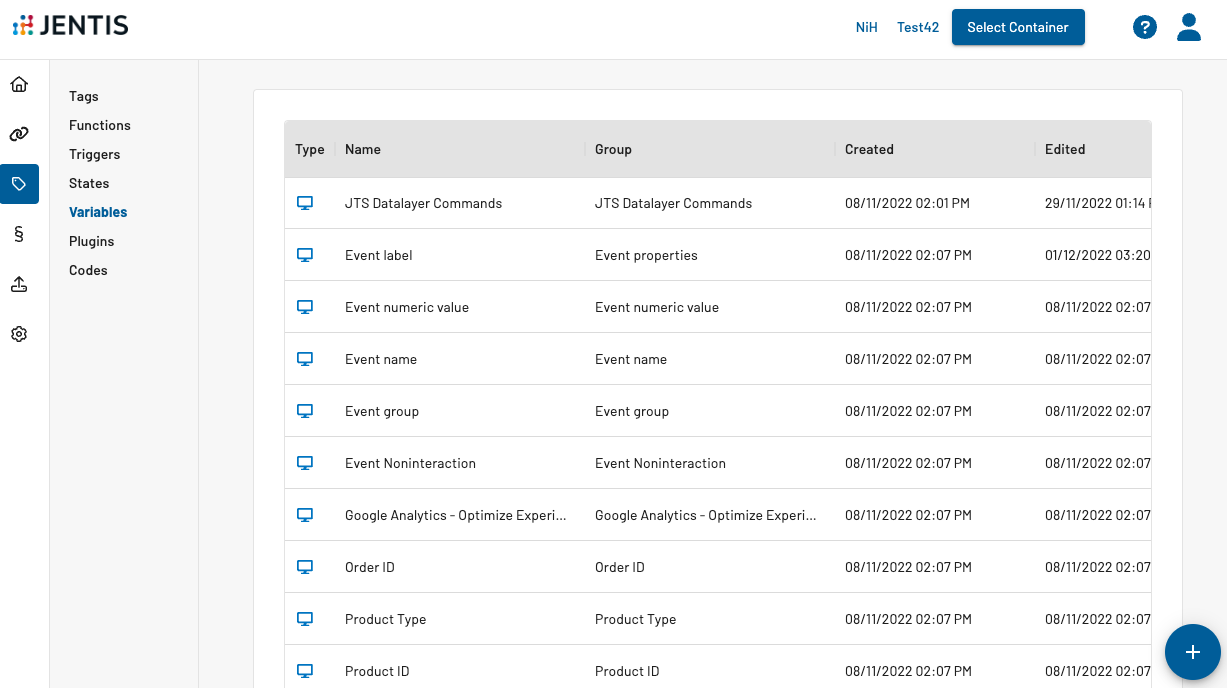
(click the “Add New Variable” button in the top right corner to create a new element)
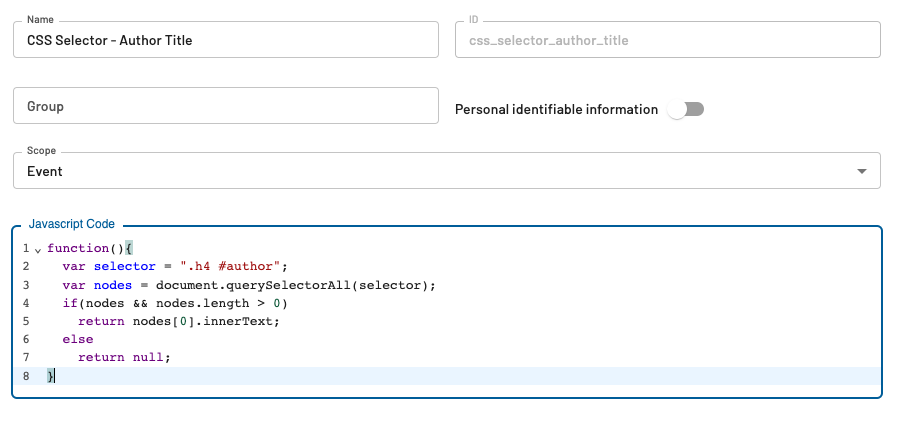
Give it a clear name, such as “CSS Selector – Author Title”, optionally a short description and add the following JavaScript function actually to retrieve the value.
function(){
  var selector = ".h4 #author";
  var nodes = document.querySelectorAll(selector);
  if(nodes && nodes.length > 0)
    return nodes[0].innerText;
  else
    return null;
}
You must make sure to adjust the value of the “selector” variable accordingly (here: .h4 #author)!
So if you need the inner text of a button, go to your website and inspect that element. In your browsers web developer tools you can right click that HTML element and select “copy: selector” that will give you the reference to actually point to the element you are looking for.
On a side note: if the value you are looking for is not available from a CSS selector, make sure also to check the following guide: JENTIS Data Layer: Push Data
Accessing Dynamically Changing Values
CSS selectors are an error-prone method to retrieve dynamically changing properties, as a website's template and theme can be changed with no further notice. Thus making this kind of configuration less reliable. It is always recommended to actively and explicitly push data as required, ie. with a data layer implementation.
So now we have that element, we can use this Frontend Variable in a JTM server-side tag.
Update the JTM Google Analytics Tag
Jentis will now do the heavy lifting for you! It will make sure that this frontend variable is only evaluated when required (saving website performance) and submitted to the server in a data model that makes the value re useable as an input to a backend variable or in a tag. The latter is the way to go in this guide.
Let's open an existing tag on our server-side setup where we want to use this new element (Frontend Variable) as a custom dimension value.
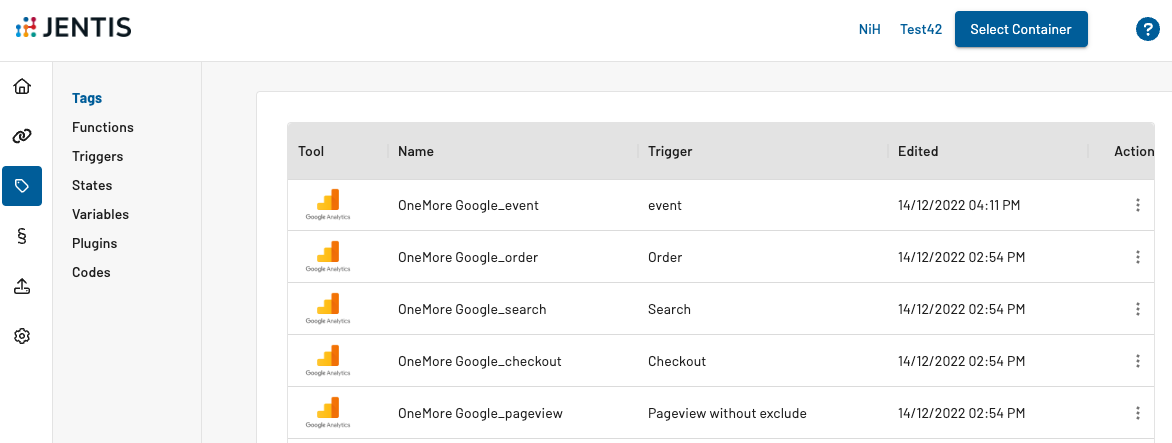
(navigate to the Server Tag Manager: Tags section and edit a tag or create a new one by clicking the "Add New Tag" button)
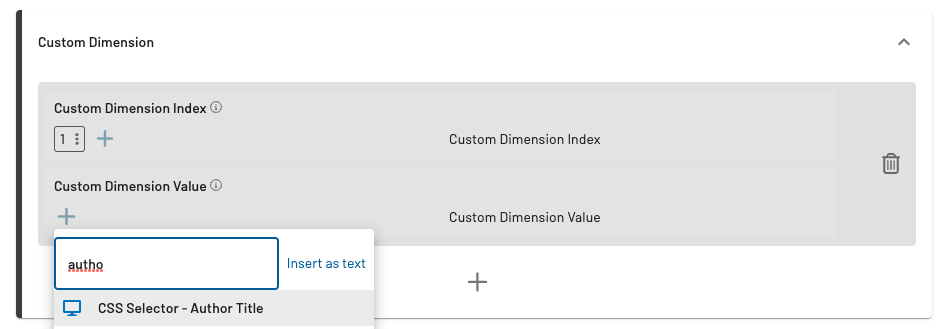
(edit the tag and define the Custom Dimension ID (index) and Value)
Here we must map the Custom Dimension value property to the new frontend variable. Select the newly created variable in the selection modal appearing after clicking the "+" icon.
When this is done, you can click the Save button, and we are done with that configuration.
Preview and Publish
To make sure everything is working as expected, we can use the preview. That is found in the “Deployment: Versions”. Where you can see all your existing versions and preview each one. Select the currently edited version (highlighted green, this is the latest version). This one contains our new custom dimension and is yet to be published.
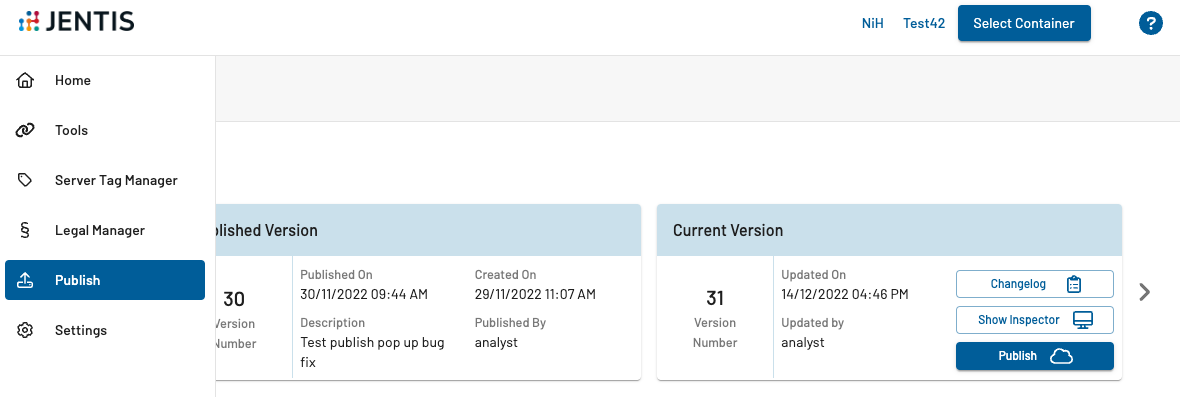
In the preview of this version we can inspect the server to server communication from your JENTIS server to the Google Analytics server. Make sure to visit your website with the quick-link to actually simulate the pageview that contains the value for our Frontend Variable.
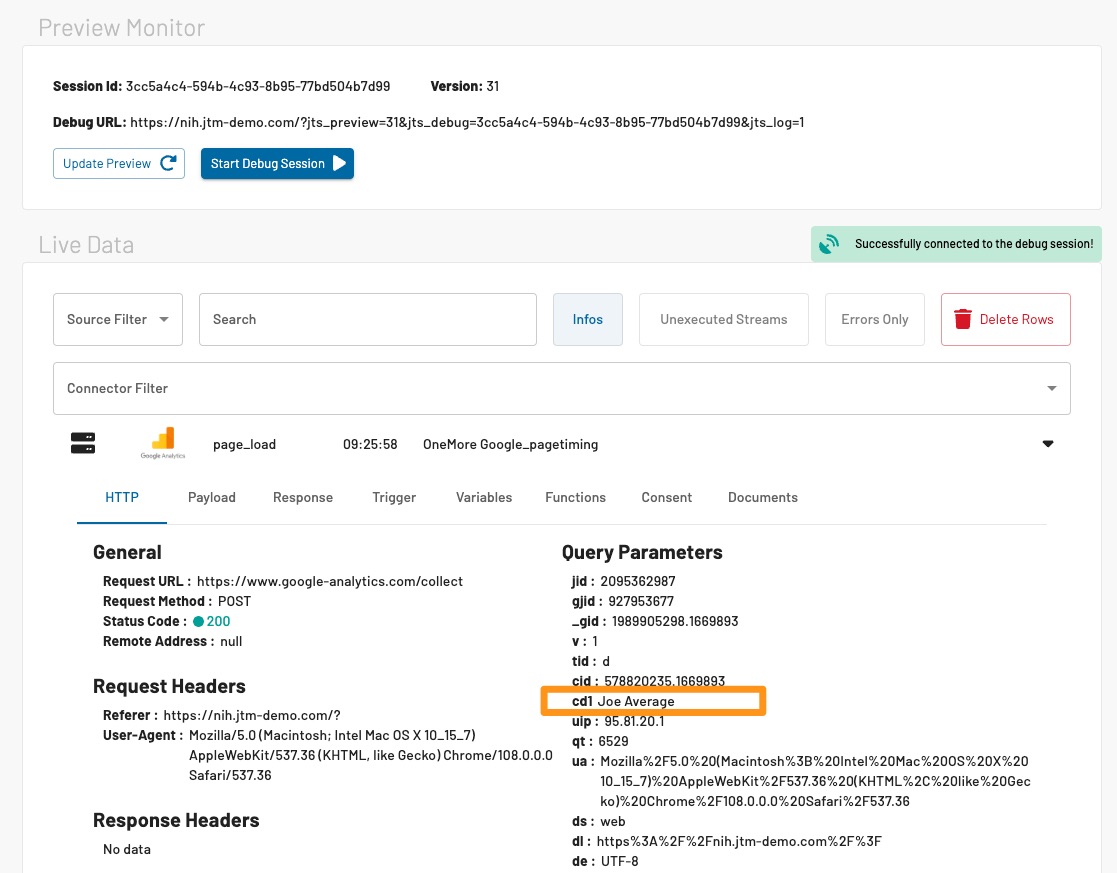
In this preview you will find the request that contains the custom dimension value: cd1: "Joe Average" (as for our example).
Now the only step left to do is to release this JTM version to public and we are done!
